How To Create a New Chapter / Page
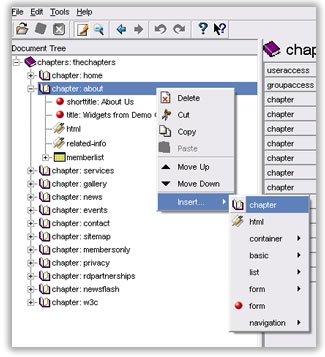
1. Choose the parent chapter for the new page, ie. choose the existing chapter where you would like your new chapter to reside. For instance, if you need to create a page called "Our Team" which is a sub-menu item of "About us" you would choose the "About Us" chapter as the parent chapter. If this new chapter is a "top-level" or "main menu" item you would select the very top chapter called "thechapters".
2. Once you have chosen the parent simply right click and choose "insert" and then choose "chapter".

3. Once this is complete you will need to provide your new chapter with some attributes. For the purpose of this tutorial we will only discuss the following three:
- name: This must be a unique name with no spaces or special characters. This name attribute will be used to create the directory (file folder) for this page.
- design: Choose the design template which your new page should assume. Selecting "default" will use the first design in your document tree.
- show-in-menu: Choose whether or not your new page should appear in your website's navigation structure, or whether it should be hidden. If hidden, you can always link to the page, it will just not be show in your menu.
4. Your new page will have a "shorttitle" node in it. The shorttilte is what populates your menu item names, ie. the text that appears in your menu. (This is true only if you have a "text based menu". WebPal sites with an "image based menu" will have to contact Palomino to have a new menu image created. If you are unsure which type you have contact Palomino.)
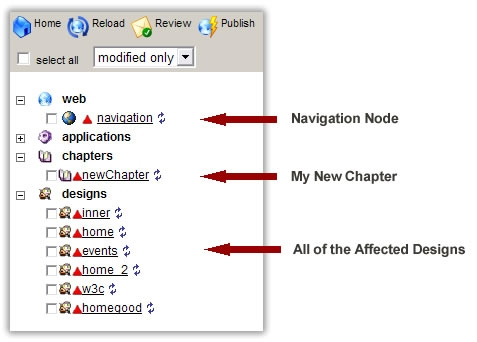
5. You're now ready to publish your new page. Flip to "preview/publish" mode and you should see a number of items marked as changed. Specifically you will need to publish:
- The new chapter;
- The "navigation" node;
- All designs in which this menu item will appear if it is marked as "show in menu: yes"


